
Have you ever found yourself stuck in a Facebook group you no longer want to be a part of? Maybe it’s a group you joined years ago and have since lost interest in. Or perhaps it’s become overrun with spam and irrelevant posts.
Whatever the reason, leaving a Facebook group is easy to do. Here at Web3NewsDesk, I’ll explain how to leave a Facebook group easily, helping you manage your online experience better.
By following the instructions in this post, you can take control of your Facebook experience and pare down your group memberships to only those you truly want to be a part of. The process only takes a few clicks, so you can leave groups with minimal effort.
Let’s get started! In just a few short minutes, I’ll have you out of any Facebook group you don’t want to belong to anymore.
Step-by-Step Guide to Leaving a Group on Facebook
Step 1: Accessing the Facebook Group
To leave a Facebook Group, you must first access the group’s page. Here are the essential steps to follow:
1. Log in to your Facebook account.
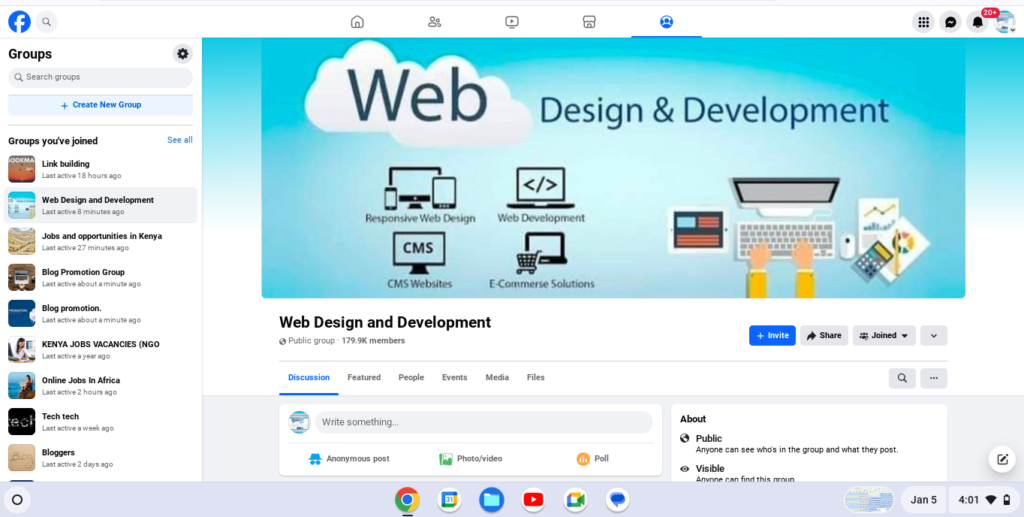
2. On the left-hand side of your News Feed, find the “Groups” section and click on it.
3. You will see a list of groups you have joined. Locate the group you want to leave and click on its name.
Step 2: Navigating the Group’s Page
Once you are on the Facebook Group’s page, you will find several options and features. To leave the group, follow these steps:
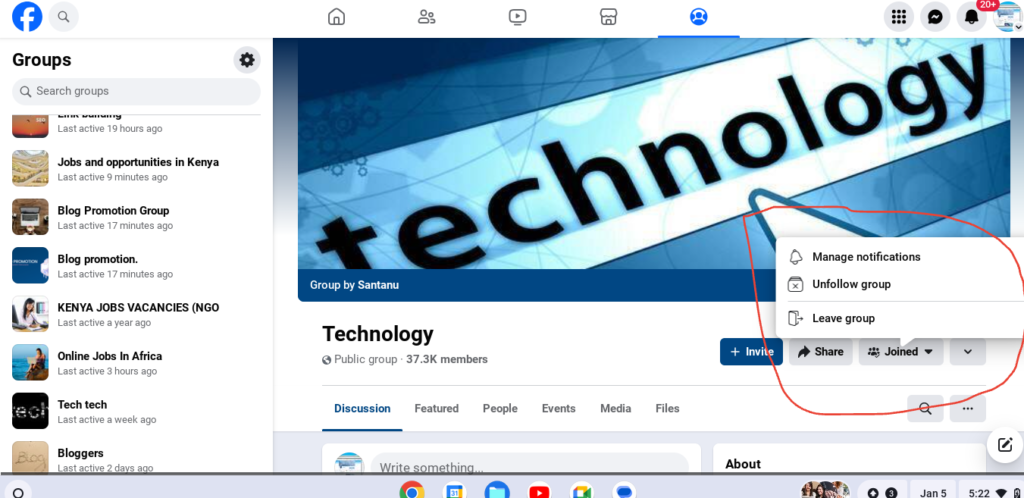
1. Look for the “Joined” button located below the group’s cover photo.
2. Click on the “Joined” button. A drop-down menu will appear.
Step 3: Leaving the Facebook Group
After accessing the drop-down menu, you will find various options related to the group. To leave the Facebook Group, follow these steps:
1. From the drop-down menu, click on the “Leave Group” option.
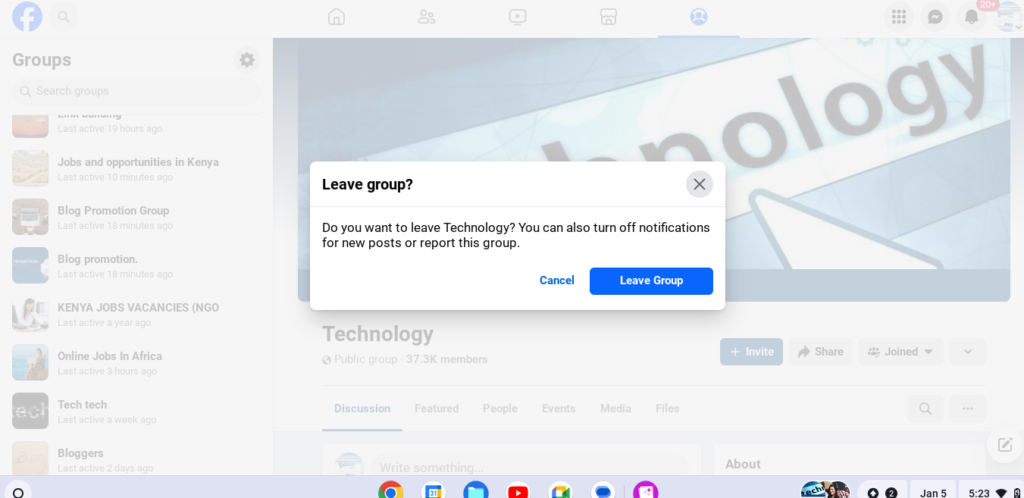
2. A confirmation dialog box will appear, asking if you are sure you want to leave the group. Read the message and make sure you want to proceed with leaving the group.
3. If you are certain about leaving the group, click on the “Leave Group” button in the confirmation dialog box.
Step 4: Confirming Your Departure
Once you have clicked on the “Leave Group” button, Facebook will process your request to leave the group. Within a few moments, you’ll receive a confirmation message. This message will confirm that you have successfully left the Facebook Group.
Additional Tips and Considerations
Leaving a Facebook Group is a simple process, but there are a few additional tips and considerations you should keep in mind:
1. Notifications and Posts
When you leave a Facebook Group, you will no longer receive notifications about new posts or activities within the group. Additionally, your posts and comments within the group will remain visible unless you delete them manually.
2. Privacy and Visibility
Leaving a Facebook Group does not affect your privacy settings or visibility on Facebook. Your profile information and posts will still be visible to your friends and other Facebook users according to your privacy settings.
3. Rejoining a Group
If you change your mind and decide to rejoin a Facebook Group you left, you can do so by following the same steps mentioned earlier. However, keep in mind that some groups may have approval processes or restrictions for rejoining.
4. Group Admins and Moderators
Leaving a Facebook Group does not remove you as a friend of the group’s admins or moderators. If you want to remove these connections, you will need to do so manually by unfriending them.
5. Group Recommendations
After leaving a Facebook Group, you may still receive group recommendations based on your interests and activities on the platform. If you do not wish to see these recommendations, you can adjust your Facebook settings accordingly.
Recommended Reading: Boosting Your Facebook Followers: Essential Strategies
Conclusion
Now you have the power to pare down your group memberships so your Facebook feed contains only the content you find truly useful and engaging. Leaving outdated, spammy, or irrelevant groups can help improve your daily Facebook experience.
While Facebook groups can be great for connecting to communities, it’s important to reevaluate your memberships from time to time. Interests and needs change, and some groups simply outlive their usefulness.
Hopefully, this post has provided clear instructions to leave groups with minimal hassle. Thanks for reading – now go enjoy a more curated, clutter-free Facebook feed! Let me know in the comments if you have any other Facebook tips and tricks you’d find useful.